
Shopify Setup: A Step-by-Step Guide to Launch Your Store
Setting up a Shopify store is less about technical skill and more about following the right sequence. Skip a step — like taxes or shipping rates — and you can end up with a store that looks ready but cannot actually take an order. This guide walks through the full Shopify setup process in the order that avoids rework, from creating your account to publishing your storefront.
What "Shopify setup" actually covers
Shopify Setup: A Step-by-Step Guide to Launch - What "Shopify setup" actually covers.
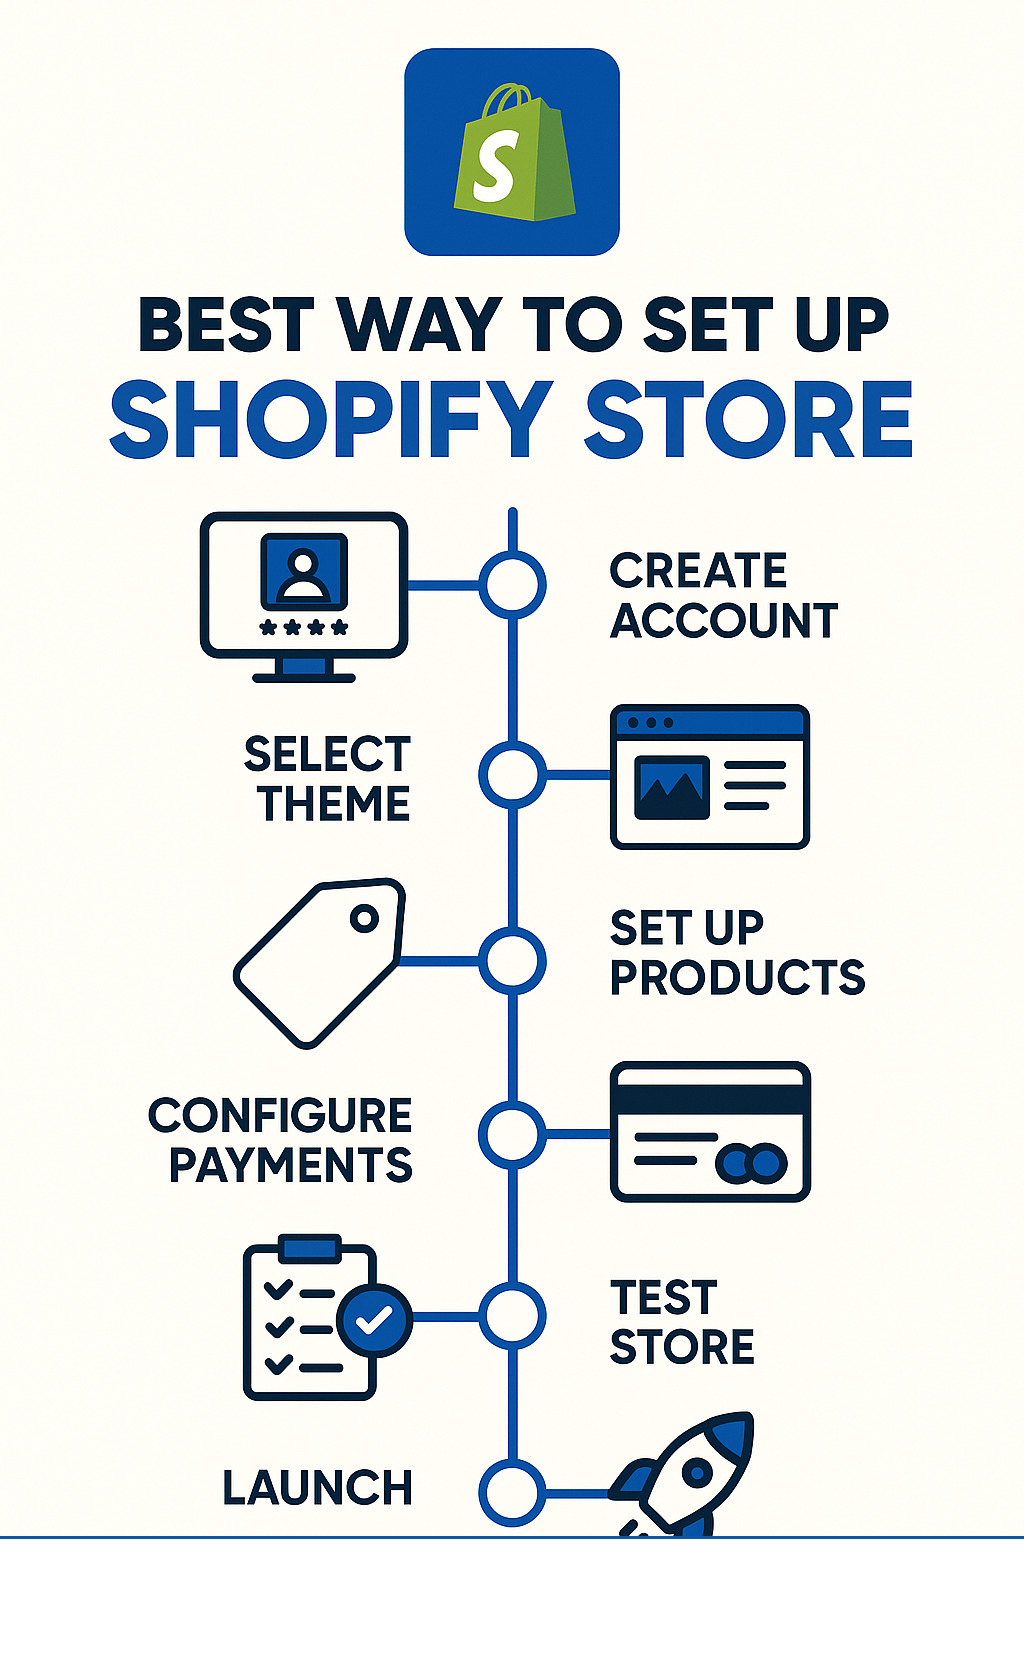
Shopify setup is the work between signing up and making your first sale. It breaks into four layers:
- Account and billing — your Shopify plan, trial, and payment method.
- Storefront — theme, navigation, pages, and brand styling.
- Catalog — products, collections, images, and descriptions.
- Operations — payments, shipping, taxes, policies, and domain.
Most beginners spend too long on the theme and too little on the operations layer. A plain-looking store that ships and charges correctly will outperform a beautiful store that cannot.
Step 1: Create your Shopify account and pick a plan
Shopify Setup: A Step-by-Step Guide to Launch - Step 1: Create your Shopify account and pick a plan.
Go to shopify.com and start a free trial. You will need a valid email address and password, or you can sign up with Google, Apple, or Facebook. Shopify also asks an optional setup questionnaire about your industry — answering it gives you more relevant default suggestions, but you can skip it.
Add a billing method during signup or later. Your store stays open after the trial only if billing is active, so treat this as a launch-blocking task rather than an afterthought. Shopify's own initial setup documentation frames the trial period as the window to complete the essential tasks before your first sale.
Step 2: Choose and customize a theme
Shopify Setup: A Step-by-Step Guide to Launch - Step 2: Choose and customize a theme.
Pick a theme before you add products, because theme structure affects how product pages and collections render.
- Open Online Store → Themes and browse the free themes first. They are fast and well maintained.
- Install one theme only. Multiple installed themes create confusion about which one is live.
- Use Customize to set colors, fonts, and layout. Shopify's theme editor changes are previewed live.
- Edit the header, footer, and announcement bar before touching individual pages.
If you want an AI-generated starting point, Shopify's store starter page lets you describe the store you want and generate a design, then refine it. Treat the generated design as a draft, not a finished brand.
Theme settings worth changing early
- Typography and color scheme — set once, applied everywhere.
- Product grid density — two or three columns depending on image quality.
- Cart type — drawer or page; drawer usually converts better on mobile.
Step 3: Add products and collections
Shopify Setup: A Step-by-Step Guide to Launch - Step 3: Add products and collections.
Add products before collections, then group them.
For each product, complete:
- Title and description written for a buyer, not a search engine.
- At least three images, with the first one square and clean.
- Price, compare-at price, and SKU.
- Inventory tracking and weight — weight matters later for shipping rates.
- Variants (size, color) with their own SKUs and stock counts.
Then create collections. Manual collections work for small catalogs; automated collections based on tags or price are better once you pass roughly 30 products. Collections drive your navigation menu, so build them before you build the menu.
Step 4: Set up navigation, pages, and policies
Your navigation menu is the store's map. Keep the main menu to five to seven items: Shop, Collections, About, Contact, and any policy pages you want visible.
Create these pages at minimum:
- About
- Contact
- Shipping policy
- Refund and return policy
- Privacy policy
- Terms of service
Shopify can generate policy templates, but read them and adjust the return window and shipping timelines to match what you actually do. Mismatched policies are a common source of chargebacks.
Step 5: Configure payments
Go to Settings → Payments and activate a provider. Shopify Payments is the default in supported countries and keeps checkout on your domain. If it is unavailable to you, add a third-party gateway or PayPal.
Test the checkout before launch. Place a real order using a test mode or a small live order, then refund it. Confirm that:
- The confirmation email arrives.
- The order appears in Orders with the correct total.
- Taxes and shipping are calculated as expected.
Step 6: Set shipping rates and delivery zones
Shipping is where most setup mistakes surface. Under Settings → Shipping and delivery:
- Define your shipping zones by country or region.
- Add rates: flat rate, free over a threshold, or carrier-calculated if you have the right plan.
- Set handling time so customers see realistic delivery estimates.
If you dropship, confirm your supplier's processing time and build it into the handling time. Promising three-day delivery when your supplier takes ten days creates refund requests you cannot win.
Step 7: Handle taxes
Tax rules depend on where you are registered and where you sell. Under Settings → Taxes and duties, configure the regions where you are required to collect. If you are unsure, get local advice — Shopify calculates the tax, but it does not decide your obligations for you.
For US sellers, nexus rules vary by state. For EU sellers, VAT registration and the IOSS scheme affect cross-border orders. Set this up before launch, not after your first international sale.
Step 8: Connect a domain
A custom domain signals legitimacy and is required for most ad platforms. Buy one through Shopify or connect an existing domain by updating DNS records. Then set it as the primary domain so all traffic resolves to one address.
After connecting, verify that:
- HTTPS is active.
- The www and non-www versions both resolve.
- Old links redirect if you migrated from another platform.
Step 9: Pre-launch checklist
Run through this before you publish:
- Billing method active
- Theme customized and previewed on mobile
- Products have images, prices, and inventory
- Collections built and linked in navigation
- Policy pages published
- Payment provider tested with a real order
- Shipping zones and rates configured
- Taxes configured for your selling regions
- Custom domain connected and primary
- Test order placed, received, and refunded
Step 10: Plan your first traffic before you publish
A launched store with no traffic is a closed store. Before you publish, decide how you will drive the first visitors: organic content, paid social, email, or marketplace listings.
If paid social is part of your plan, competitor research belongs in the setup phase, not after your first failed campaign. Tools like PrimeSpy let you search ads by keyword, URL, or advertiser across Facebook, TikTok, and the Meta Ad Library, and filter by spend, reach, and duplication. The practical use during setup is narrow but real: before you write product descriptions and creative, check which angles are already saturated in your niche and which are underserved. That is research, not copying — you are looking for gaps, not templates.
For a broader view of how ad research fits into a store launch, see our breakdown of ecommerce ad search and how creative analytics informs which ad concepts are worth testing first.
Common Shopify setup mistakes
| Mistake | Why it hurts | Fix |
|---|---|---|
| Customizing the theme before adding products | Layout breaks when real content loads | Add 5–10 products first, then style |
| Skipping shipping zones | Checkout fails or shows wrong rates | Configure zones before testing checkout |
| Using default policy templates unedited | Return windows contradict your practice | Edit every policy to match reality |
| No test order | Payment issues surface in front of customers | Place and refund a real order |
| Launching without a traffic plan | Zero sessions, zero learning | Decide channel and budget pre-launch |
Related reading
- PrimeSpy vs SocialPeta vs Pipiads: 2026 Ad Spy Comparison - Compare PrimeSpy, SocialPeta, and Pipiads on ad coverage, search, creative analytics, and pricing to choose the right ad intelligence tool in 2026.
- Minea Pricing 2026: Plans, Credits & Real Costs Explained - Minea pricing explained: Starter $49, Premium $99, Business $399, credit costs per action, annual discounts, and when a cheaper ad spy tool fits better.
- PrimeSpy vs AdsLibrary vs AdFox: 2026 Ad Spy Comparison - Compare PrimeSpy, AdsLibrary, and AdFox on ad coverage, search, pricing, and workflow to choose the right ad intelligence tool in 2026.
Sources and further reading
- Shopify Tutorial for Beginners 2026 - Full Store Setup Guide - Enjoy the videos and music you love, upload original content, and share it all with friends, family, and the world on YouTube.
FAQ
How long does Shopify setup take?
A functional store can be live in a day if you use a free theme and a small catalog. A store you are comfortable advertising usually takes three to seven days, mostly because of product photography, policy writing, and payment testing.
Do I need a custom domain to start?
You can launch on the default myshopify.com address, but a custom domain is strongly recommended before running ads. It affects trust, email deliverability, and how ad platforms review your destination URL.
Can I set up Shopify without a business entity?
Yes, you can open a store as an individual in most regions. However, payment providers and tax registration may require business details depending on your country and volume.
What should I do first after publishing?
Place a test order from a different device, confirm the confirmation email and order record, then start driving traffic from one channel so you can attribute results cleanly.
Is Shopify setup different for dropshipping?
The core steps are the same, but shipping handling time, supplier lead times, and product descriptions need more scrutiny because you do not control fulfillment.
Conclusion
Shopify setup rewards sequence over polish. Get the account, catalog, payments, shipping, and taxes correct first; then refine design and start traffic. The stores that launch smoothly are the ones that tested checkout and configured operations before publishing, not the ones with the most customized theme. Work through the checklist above in order, and your store will be ready to sell the day you make it public.